
Your shopping cart is currently empty.
![]()
Sign in and join Kleen Rite rewards to earn points and redeem rewards
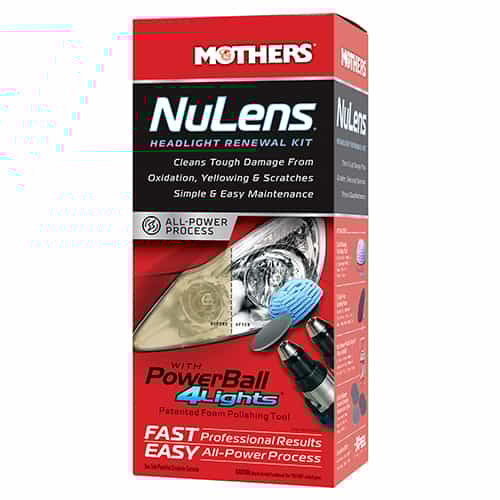
Detailers and auto shops love these easy to use Mother NuLens Headlight Renewal Kits! See what they see in just a few quick steps: significant improvements in clarity and brightness of worn, weathered vehicle light covers! These kits provide professional light restoration results that appeal to a wide range of car owners, restoring clarity and shine to plastic light covering lenses, and leaving an oxidation-inhibiting protective shield to help protect the lens from further etching. This is a case of 6 Mothers NuLens Headlight Restoration Kits priced right for easy retail resale in your auto care and accessory area. The bulk purchase is also great for mobile detailing professionals, each containing all the necessary components to address weathered, yellowed headlight lenses for improved visibility. Buy a case or two from Kleen-Rite today!
Mothers NuLens Headlight Renewal Kit is engineered to quickly and safely clean, restore, maintain and protect smooth, shiny plastic and acrylic headlights. Popular with professional detailers, this kit easily removes yellowing and stains, and even buffs out unsightly hairline scratches, smudges and flaws in a single process. The included PowerPlastic 4Lights polish restores crystal clarity, leaving a tough protective, oxidation-inhibiting polymer layer to guard against future degradation from the elements.
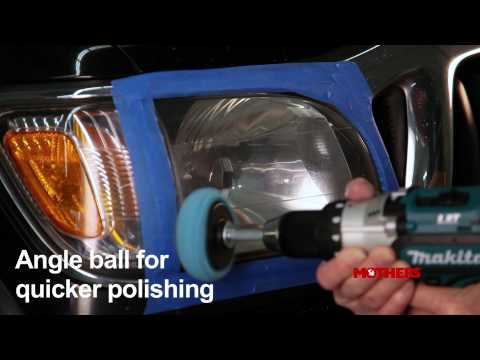
Headlight restoration kits work using a 3 step process. The effectiveness depends on the severity of the damage, and the restoration process requires some effort. First, you remove the damaged layer using abrasive compounds and wet-sanding which wears away the oxidized and discolored top layer of the plastic headlight lens. Next the polish is applied to shine and clarify the newly exposed surface. The polishing process restores clarity, and the final crucial step is applying a sealant on top of the polish, often with more UV protection, to prevent the plastic from hazing again. Hazing will naturally reappear over time and regular, monthly inspection of restored lenses is recommended. Typically, you can expect to see clarity decline within a year. Reapplying sealant or a separate clear coat after polishing can help to protect against future UV damage and enhance the longevity of the restoration process.
Each automotive kit includes a small 8 fl oz. bottle of PowerPlastic 4Lights polish which restores crystal clarity, PowerBall 4Lights polishing tool, Quick Swap 3” backing plate, and headlight lens restoration discs to get back to crystal clarity in minutes. Components are reusable, keep the kit stored in your car or in your garage to access it whenever you notice stains starting to form.
6 Complete Kits in each case.
Kit Includes:

Your shopping cart is currently empty.
![]()
Sign in and join Kleen Rite rewards to earn points and redeem rewards